DIY wooden bird feeder easy
to make
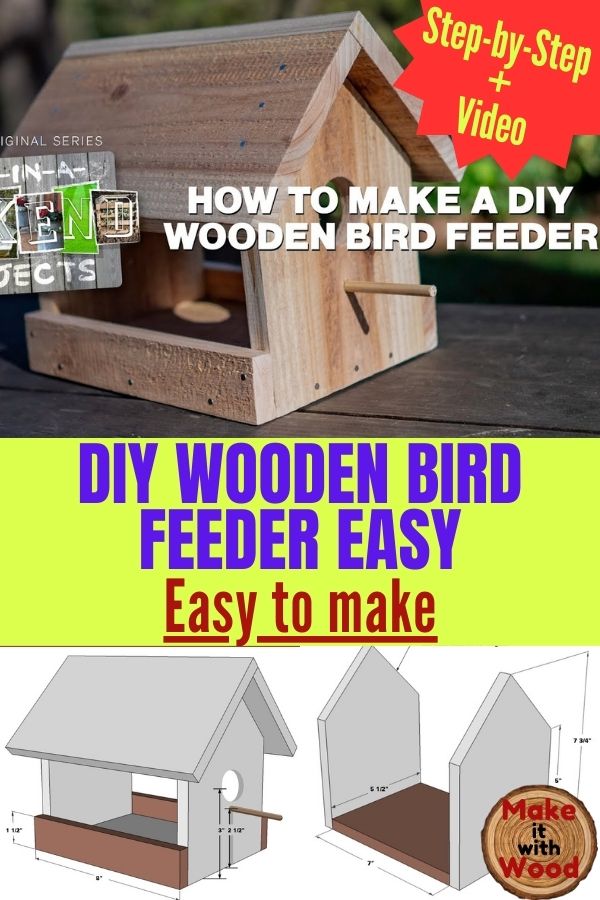
Create a backyard bird haven with this DIY wooden bird feeder easy to make. Picking the right location to place your bird feeder plays a significant role in attracting these beautiful animals.
Doug Scott will walk you through the steps for building a simple bird feeder and the best location for it. He also shares the advantages of different types of feeders so you can create the best birding experience in your backyard.
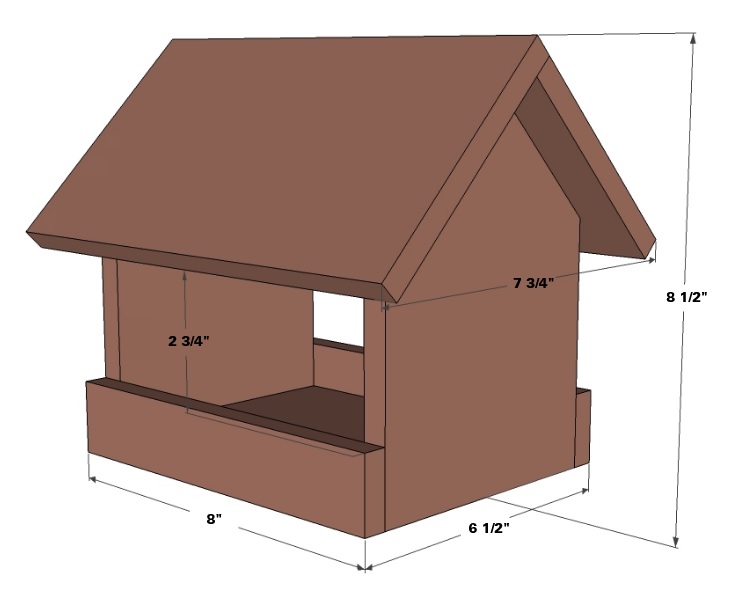
TOOL LIST
Miter saw OR circular saw
Cordless drill and drill bit set
1 1/2″ Spade drill bit
Tape measure, speed square and marking pencil
Brad nailer (finishing nailer)
Utility knife
Caulking gun
Paint brush
Safety glasses and ear protection
MATERIAL LIST
(1) cedar fence picket (5 1/2″ wide x 72″ long x 1/2″ thickness)
1/4″ dowel rod
(1) box of 1 1/4″ finish nails OR small screws
MATERIAL AND CUTTING LIST
CUTTING LIST
(2) – 7 3/4″ gable walls
(cut gable end point at 45° angles)
(1) – 7″ floor
(1) – 10″ shorter roof
(rip 1/2″ off one edge to make width 5″)
(1) – 10″ longer roof
(1) – 8″ side rail
(measure and cut to fit, as sides as this may vary slightly
depending on thickness of wood used)
(2) – 1 1/2″ high side rails
(cut from 8″ side rail listed above)
BUILD STEPS
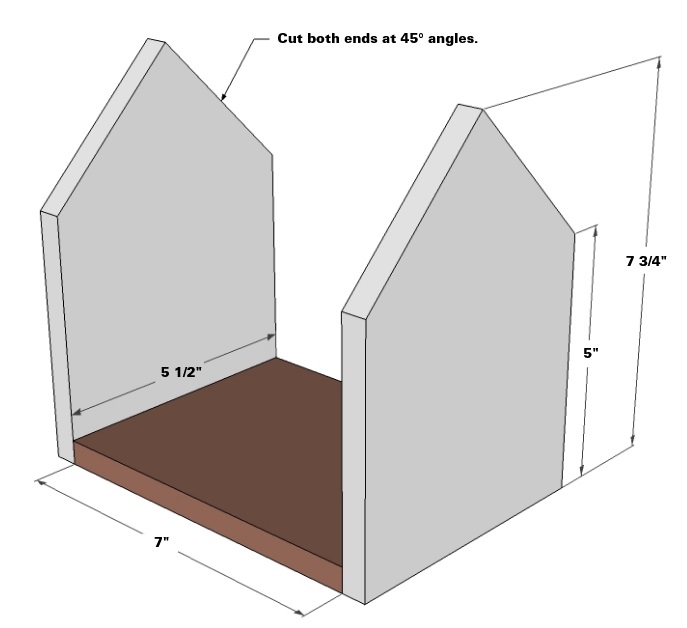
- First, Attach walls to bottom with finishing nails or wood glue (or both).
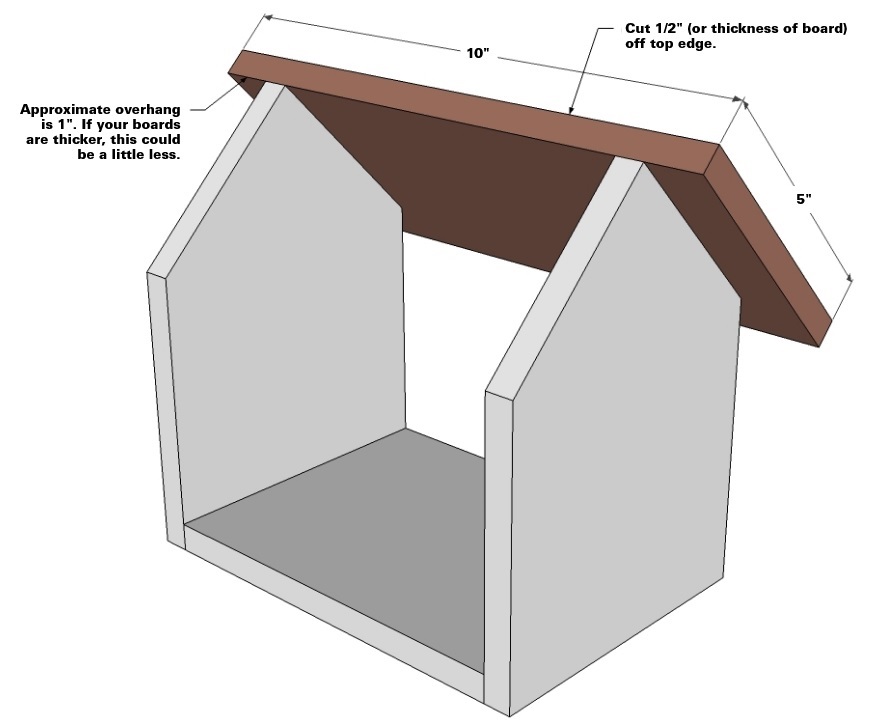
2. Attach short roof to walls with finishing nails or wood glue (or both).
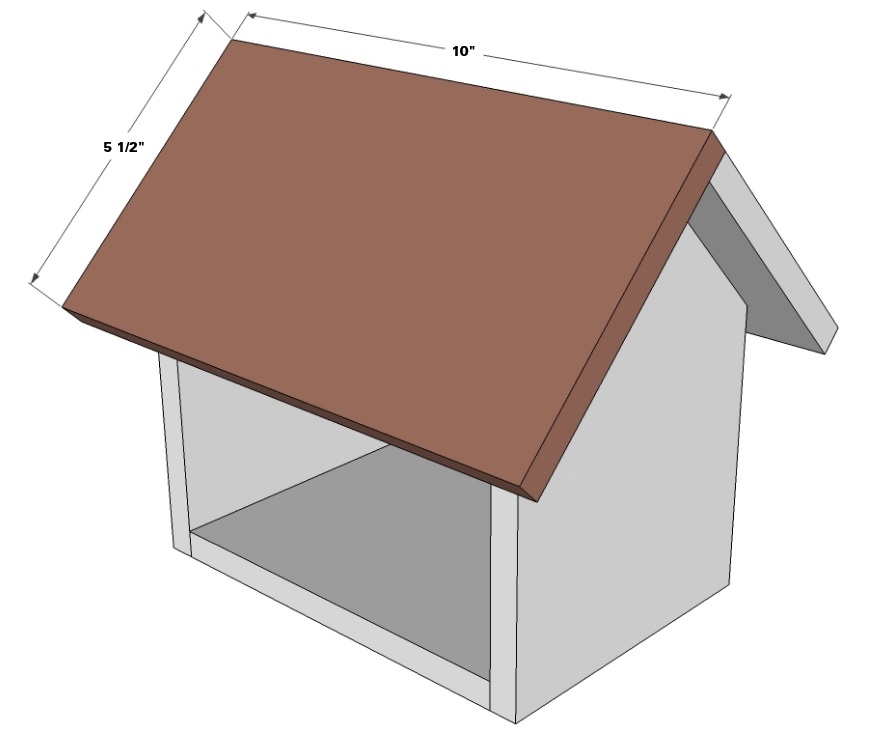
3. Attach wider roof to walls and shorter roof with finishing nails or
wood glue (or both).
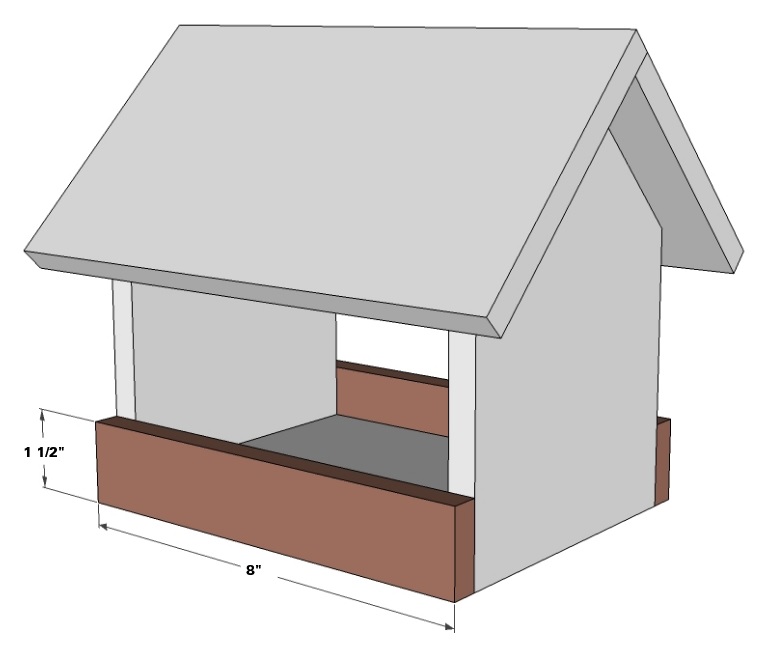
4. Attach side rails to sides with finishing nails or wood glue (or both).
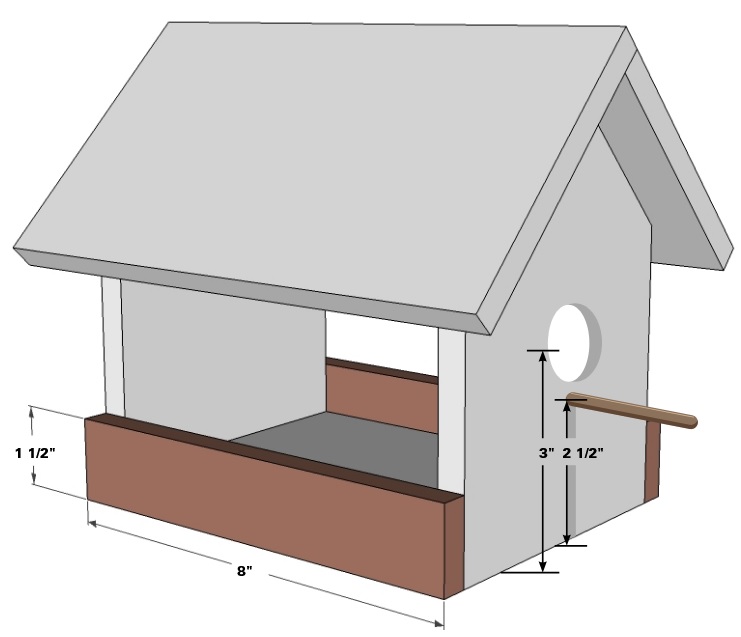
Finally, drill a 1 1/2″ hole using a 1 1/2″ spade drill bit to create a feeder opening,
and drill a 1/4″ hole for a 1/4″ dowel rod to create a perch. Repeat this process
for both sides of the feeder.
Step by step DIY wooden bird feeder easy to make
See Also
Spring and summer wood crafts to sell
EASIEST DIY Birdhouse with Minimal Tools, Every Step Explained
